
A rusty fire pit is more than an eyesore. Flaking metal can stain patios, weaken the bowl, and shed sharp particles near ash. The repair method depends on the metal, rust depth, and existing finish. Surface rust often responds to a wire brush, abrasive pad, mild detergent, and a high-temperature coating. Deep pitting may require replacement instead. Do not work on a warm pit.
The NACE IMPACT study estimated that corrosion costs the global economy about $2.5 trillion annually, equal to roughly 3.4% of global gross domestic product. It also reported that better corrosion-control practices could save 15% to 35% of those costs. These figures explain why small maintenance steps matter. Dry storage, a fitted cover, and prompt ash removal can slow moisture-related damage around the fire bowl and legs.
Corrosion educator Dr. Alec Groysman offers a useful principle: “Corrosion is a natural process; control is the practical answer.” That idea guides this Fire Pit Rusty repair process. We will inspect the surface, remove loose oxidation, treat remaining rust, and protect the cleaned metal. Wear gloves, eye protection, and a dust mask while brushing. Collect the debris instead of blowing it across the yard. A mistake is possible here: aggressive grinding can remove sound metal, while weak cleaning leaves hidden rust beneath the paint. Check the manufacturer’s instructions before applying any coating. A clean-looking pit is not always a structurally safe one.
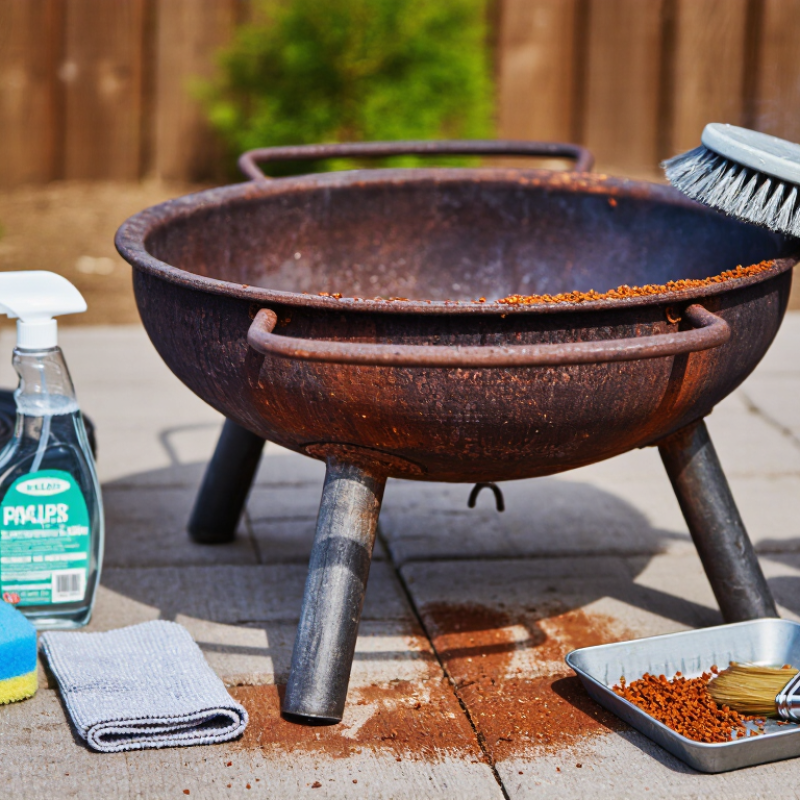
How to Remove Rust from a Fire Pit?
Inspect rust depth before choosing a cleaning method. Let the fire pit cool completely, then remove ash with a dry brush. Check the bowl bottom, drain holes, seams, legs, and welds. Light orange rust feels rough but leaves solid metal underneath. Deep pitting creates small craters, sharp edges, or flaky layers. Tap suspicious areas gently with a blunt tool. A dull, hollow sound may signal weakened steel.
Do not ignore pinholes or paper-thin sections. Heat can enlarge hidden damage. The NACE IMPACT study estimated global corrosion costs at 2.5 trillion dollars annually, equal to about 3.4% of global economic output. That figure covers many industries, but it shows why early inspection matters. For shallow rust, use a stiff nylon or wire brush, then sand until the surface feels firm. Wipe away dust before applying a heat-rated protective coating. Follow the coating’s curing instructions carefully.
Stop cleaning if the bowl flexes, cracks, or leaks. Replace severely damaged parts instead. A fire pit with deep pitting may look acceptable after paint, yet remain unsafe under repeated heating. I once underestimated rust around a drain opening; the metal looked stable until pressure exposed a thin edge. My mistake was checking color, not thickness. ASTM G1 recommends careful cleaning and visual examination during corrosion evaluation, but household inspection is less precise. When doubt remains, ask a qualified metalworker to assess the steel.
| Inspection Dimension | How to Check | Typical Finding | Meaning | Recommended Action |
|---|---|---|---|---|
| Loose surface rust | Brush a small area with a stiff nylon or wire brush and wipe away the powder. | Orange-brown scale comes off, but the metal remains firm and mostly smooth. | Usually cosmetic oxidation with little measurable steel loss. | Clean, dry completely, remove remaining loose scale, and apply a suitable high-temperature protective coating if appropriate. |
| Rust scale thickness | Scrape a representative spot with a putty knife, then measure any depression with a depth gauge or caliper. | Flaking scale is present, but there are no holes or soft areas. | The visible rust layer is not the same as steel loss; the surface underneath must be assessed. | Remove only loose scale first, then reassess the exposed steel before using abrasive tools. |
| Pitting depth | Measure the deepest pits at several locations, especially around the base, drain holes, seams, and air vents. | Pits are shallow, with no cracks, perforations, or movement when pressed. | Shallow pitting can often be cleaned, but it reduces the local steel thickness. | Continue cautiously with brushing or light sanding; do not grind aggressively into thin areas. |
| Steel thickness condition | Compare the affected area with an unworn section. If available, use an ultrasonic thickness gauge. | The affected section feels substantially thinner, bends easily, or differs visibly from sound steel. | Reduced thickness can compromise heat resistance and structural stability. | Stop abrasive cleaning and replace the component if thinning is extensive or its load-bearing function is affected. |
| Holes and perforation | Inspect the underside with a flashlight and look for daylight, pinholes, or ash falling through the bowl. | Any hole, open seam, or perforated section is visible after loose rust is removed. | The fire pit no longer provides reliable containment for embers and ash. | Do not use it for a fire; replace the bowl or have it professionally repaired with heat-suitable materials. |
| Cracks and distorted metal | Check welds, legs, handles, rims, and areas around fasteners for cracks, separation, or warping. | Visible cracking, sharp split edges, severe warping, or loose supports. | Heat cycling and corrosion may have weakened the structure. | Do not attempt routine rust removal; discontinue use until the defect is repaired or the fire pit is replaced. |
| Drainage and moisture traps | Check drain holes, overlapping joints, feet, and the underside for trapped water, wet ash, or mud. | Rust is concentrated where water or damp ash remains after rain. | Persistent moisture accelerates corrosion and can make cleaned steel rust again quickly. | Clear blocked drains, remove damp residue, dry fully, and store the fire pit under a breathable cover. |
| Cleaning method suitability | Match the tool to the condition of the metal and work in a ventilated outdoor area. | Light rust needs brushing; heavier scale needs controlled scraping or sanding. | Overly aggressive grinding can remove sound steel and create weak spots. | Use a brush or fine-to-medium abrasive first, wear eye and respiratory protection, and avoid chemical residue inside the fire bowl. |
| Final condition before reuse | Confirm the surface is dry, stable, free of loose flakes, and structurally sound. | No loose scale, open holes, unstable legs, sharp corrosion edges, or trapped water remain. | The fire pit is ready for protection and cautious use if no structural damage is present. | Remove all cleaning dust, follow the coating cure instructions if used, and begin with a small monitored fire. |
Let the fire pit cool completely. Remove ash with a dry brush. Check the bottom, drain holes, seams, legs, and welds. Light orange rust usually leaves solid metal underneath. Deep pits look like small craters. Sharp edges and flaky layers need attention. Tap suspicious areas gently. A dull, hollow sound may indicate weakened steel.
Stop if the bowl flexes, cracks, leaks, or contains pinholes. Replace sections that feel paper-thin. Heat can enlarge hidden damage. Paint may hide serious weakness. I once judged rust by color alone. That was a poor check. Metal thickness matters more than appearance.
Wear safety glasses, durable gloves, long sleeves, and hearing protection. Use suitable respiratory protection when dust or old coatings create hazards. Keep loose clothing away from tools and flames. Work outdoors, upwind from the dust. Keep children and pets away. Small planning mistakes can matter.
Use a scraper, stiff brush, or controlled chipping tool. Remove loose rust, scale, and failing coating. Use steady strokes instead of aggressive blows. A small abrasive pad helps around welded corners. Collect debris with damp methods or a suitable vacuum. Avoid dry sweeping.
Stop disturbing the coating if its composition is unknown. Older paint may contain harmful materials. Arrange professional testing before continuing. Do not create a cloud of dust. Safe metal matters more than a perfectly clean appearance.
Dry every surface completely, including seams, legs, and drain holes. Leave it in a dry, covered area for at least 24 hours. Wait longer after washing or rain. Wipe the metal with a clean cloth. The cloth should remain dry. I once coated damp steel too soon. Bubbles appeared after the first burn.
Apply it only to exterior metal surfaces. Choose a coating rated for temperatures up to 1,200°F. Do not coat the cooking grate, inner bowl, or food-contact areas. Apply thin, even coats outdoors or with strong ventilation. Keep the steel cool while spraying.
Follow the stated recoat and curing times. A surface can feel dry yet remain uncured underneath. Thick coats may wrinkle, smell strongly, or cure unevenly. Use the first burn as a controlled inspection. Never exceed the coating instructions. Check the base after several fires, where ash and water collect.
Removing rust from a fire pit begins with a careful inspection. Determine whether the corrosion is superficial or has caused deep pitting, cracks, or weakened steel; severely damaged metal may not be safe to restore. For a Fire Pit Rusty surface, wear gloves, eye protection, and a suitable mask, and work outdoors or in a well-ventilated area. Follow SSPC-SP 2 hand-tool cleaning principles by using a wire brush to remove loose rust, scale, and flaking material, then smooth remaining corrosion with an 80–120-grit abrasive.
For stubborn rust, apply a controlled 5–8% acetic acid solution to the affected areas, allowing it to work briefly without oversaturating the fire pit. Rinse thoroughly and neutralize any remaining acidity with clean water and a mild alkaline rinse. Dry the metal completely, including seams and recessed areas, before applying an exterior-only coating rated for temperatures up to 1,200°F. Reinspect the surface regularly and keep the fire pit dry between uses to slow future corrosion.
